
About a year ago I set out to create me a Windows 7 live CD. Finally, I am able to present you with the How-To. But before we get into that, let’s review what a LIVE CD is.
A Live CD is an actual Windows Installation that you carry with you on a USB Flash Drive or CD/DVD. The Windows Installation is portable, meaning that you can have your own windows running on any PC you encounter. The Live CDs are most commonly used to repair computers that have crashed or to rescue data from a hard drive before doing a fresh installation. The great thing about a Live CD is that it
does not alter anything on the computer you use (almost like a sandbox). You boot the computer as if it is your own (from the CD/DVD or USB). You can pre-install all the software you like, making it available no matter where you are. Sort of a Laptop, but without the hardware.In the Linux World it has been around for years ( and as Windows XP). But Windows 7, well it’s been a longer road. You have of course been able to download illegal Windows Live Copies on the net for a while – but now at last I am able to show you have to create your own legal copy (for your personal use), provided you own a Windows Setup Disk and license.
Enough chit chat, let’s get on with it…
The overview
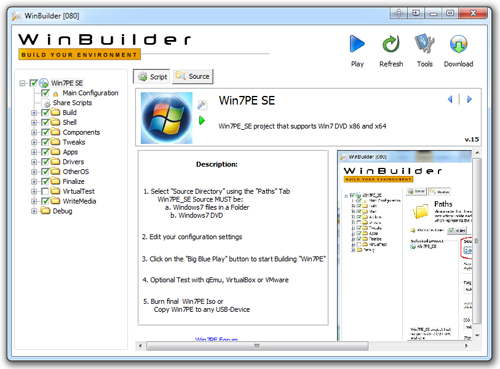
In order to create a Live CD from Windows 7, we need to download a utility called WinBuilder (download link at the end of this article). We also need a whole bunch of scripts to program our Live CD. Luckily there are hundreds of ready scripts available for us to download, so you don’t have to be a geek to get it working. I have a set of working scripts available to you, but first, let’s look for those custom ones. Go ahead and download the WinBuilder application.
NOTE!
DO NOT place Winbuilder on your Desktop or other “User Related” folders.
- Upon first launch, WinBuilder will open the Download Script Page, which allows you to browse through lots of available projects. The first thing we do is updating the servers list and choose the “winPE 7″ project. This is a beginners project, with most common scripts you need to get started. More scripts and functions may be added later on.
- Choose “Complete Set” from the dialogue, and click Download.
- Once a project has been downloaded, close the Download page or reboot WinBuilder (you can always go back and download other scripts and add ons by clicking on the Download Button in the main window). Should you come across a script you would like to use, it can also be added manually by copying it into the WebBuilder Project folder.
- If you are a curious geek, who like to tweak everything, go ahead and look through the downloaded scripts, tweak everything from windows theme, wallpaper, sounds etc.

Running the scripts
- Once a project has been chosen and tweaked, you need your Windows Setup Disk, as the scripts will copy everything they need from it.
- Click The Source Button, and choose the path for the Setup Disk.
- Next, Expand the Finalize Folder in the script overview window and choose the apropriate settings (Create ISO, copy to USB-drive etc.).
- Then, click the PLAY button and wait while WinBuilder does the rest.